 There are over 1.3 billion users on Facebook, out of which around 81 Million users are Fake (Fake Facebook profiles).
Somebody creating a Fake profile of yours is not a Big deal for
Facebook unless you represent a law enforcement agency or an Expensive
Legal firm. Most fake Facebook profiles are set-up by adolescents in
relationships seeking to destroy reputation of their ex-partner.
There are over 1.3 billion users on Facebook, out of which around 81 Million users are Fake (Fake Facebook profiles).
Somebody creating a Fake profile of yours is not a Big deal for
Facebook unless you represent a law enforcement agency or an Expensive
Legal firm. Most fake Facebook profiles are set-up by adolescents in
relationships seeking to destroy reputation of their ex-partner.Identity theft is common on Facebook, But somebody using your image to harass or play with other people you know, thereby defaming you is really embarrassing and malicious.
While you can always report such imposters profile to Facebook using their Report form, it takes hell lot of time for Facebook to review the profile and disable it. Also Facebook will never disclose to you any details about the fake profile, like when it was created and from which Computer it was operated. Facebook will provide Information regarding fake profile only when there is Police intervention and this is very long process.
Moreover police will not go through the hassle of contacting Facebook and behave like a loyal dogs to track down the imposter unless the matter is very serious. Once you have the IP address of fake profile user, you will then need to get a court-order for the ISP to reveal the information and billing address of the person involved. Remember If the fake profile user had used a proxy server to hide real-IP, it would be very difficult to track down the real IP address.
Here in this post we will show you how exactly you can Find an IP address of a fake Facebook user and even nab the culprit.
Facebook chat runs on XMPP protocol now which is not peer-2-peer, so it is not possible to determine the IP address of the user through Facebook Chat using Netstat command. All we will be doing is use some social engineering skills and default ‘Banner grabbing‘ technique of a web server.
Banner Grabbing is an enumeration technique used to get information about a particular computer system on a network/internet (Information like: Operating system, browser, IP address, etc.)
1. Collect as much information about the fake profile as you can and identify all of the people who are connected to the profile. Make a list of connected people to this account who are your real life friends.
2. Select any one of your close friend or relative on that list (select most trusted person). The person which you have selected will be doing all the job for you. If there is nobody you can trust on this list then ask any of your trusted friend to Befriend this fake profile user.
3. Ask your Friend to start chatting with this fake user casually everyday. (Remember whatever you do should remain between you can your friend. do not let it spread among other close friends)
4. Now Go to http://iptracking.geniushackers.com and fill in your valid email address and enter any name in the ‘Link Name’ field. Click Generate.
5. In the next page you will get a unique link. Just copy this unique link that will look something like this one:
http://iptracking.geniushackers.com/friendship.php?linkid=0gds65g1s2dg169741f32428a9
6. Next goto https://goo.gl and paste your ‘Unique URL’ (that is too long) in the text field and click shorten URL. You will get short URL that will look something like this: http://goo.gl/5HJY2s.
7. Ask your friend to send this shortened URL to the Fake profile user along with some nice message via chat such that he should click on that URL. Example message:
“Hey wassup? i found this really nice story, read here: http://goo.gl/5HJY2s“

Steps for Tracing fake profile user and catching the culprit:
Now that you have found out the IP address of the fake user, its time to know more about this fake user.
9. Goto http://www.iptrackeronline.com and enter the ‘IP address’ of the fake user, click submit query.
10. On the new page, scroll down a bit and you will get to see all the details like ISP, Area-code, Postal-code, etc. regarding his IP address along with a Map.
11. Relate these details with the suspect. If you are not able to suspect anyone then approach your attorney or lawyer, he will file the necessary documents for the ISP to disclose the subscriber details for the IP address.
12. If you are suspecting anyone but not sure if its him then repeat the steps 3 to 8 for this suspect. You can take help of the same friend and ask him to craft some different message accompanied by IP tracking link for this suspect.
13. As soon as your suspect clicks this link, you will have his IP address. Now match his IP address with the IP address of the Fake user. If there is a match, well congrats!! you have successfully nabbed the culprit.
Hope this helps.
Most of us are very curious to learn Hacking and want to become a Hacker, but don’t know where to start. If you are in a similar situation, then this article will most likely guide you to reach your goal.
“How to Become a Hacker?” This question is not an easy one to answer, since hacking is
not an art that can be mastered overnight. It requires knowledge,
skills, creativity, dedication and of course the TIME. Everyone
can become a hacker provided they learn it from the basics. So, if you
wanna become a hacker, then all you need is a good source of knowledge
that will guide you through various concepts of hacking from the basics.
What Skills do I Need to Become a Hacker?
In simple words, there is no magic to
become a Hacker. But, like anything else that is worthwhile, it takes
dedication and willingness to learn. It is most important to have
a basic knowledge of the topics such as operating system basics and it’s
working, computer networks, computer security and of course
programming. However, you need not be the expert in each or any of those
topics mentioned. As you gain the basic knowledge of various branches
of computer, you can choose any one as your favorite and advance in it.
What is the Best Way to Become a Hacker?
As said earlier, the best way to become a
hacker is to start from the basics. You will have to master the basics
to build a strong foundation. And once this is done, you’ll be in a
position to explore new ideas and start thinking like a Hacker.
There exists tons of books on the market
that will teach you hacking, but unfortunately, it requires a set of
pre-established skills and knowledge to understand the concepts
explained in those books. Also, most of them are not suitable for
the beginners who doesn’t know anything about hacking.

This book will take you from the core to
the top. It will tell you how to hack in simple steps. Everything in
this book is presented in a simple and effective manner. It is a great
source for the beginner who would like to become a hacker. This will
install a Hacker’s Mindset on you.
The following skills are uncovered in this book:
You will learn all the hacker underground tricks and learn to apply them in real world situations.
-
You will be put into a hacker mindset so that you will learn to think like a Hacker.
-
By learning how a hacker thinks and acts, you will be able to protect yourself from future hack attacks.
-
You will acquire knowledge nonexistent to 99.9% of the people in the world!
-
This underground handbook may get you interested in pursuing a career as an Ethical Hacker.
-
This book is of great value for all those who have a dream to become a Hacker.
So what are you waiting for? Go grab your copy now from the following link:
In my earlier post, I had discussed about How to find the IP address of
a remote computer. After you obtain this IP address, it is necessary to
trace it back to the source. So, in this post I will show you how to trace any IP address back to its source.

How to Trace the IP Address Back to the Source?
In fact, tracing an IP address back to
its location is a lot simpler than what many people imagine. There
exists many online tools using which you can accomplish this job. One of
my favorite site is IP2Location.com.
Just go to http://www.ip2location.com/demo.aspx and
enter the IP address that you want to trace in the dialog box and click
on “Find Location”‘. With just a click of a button you can find the
following information for any given IP address:
-
Country in which the IP is located
-
City to which the IP address belongs to
-
Latitude/Longitude of the IP’s location
-
Zip Code of the region to which the IP belongs to
-
Time Zone associated with the IP
-
Name of the ISP to which the IP address belong to
-
Internet Speed of the computer associated with the IP
-
Weather Station associated with the region of the IP
-
Domain name associated with the IP address
A sample snapshot of the results from ip2location.com is given below:
You can also visually trace route any IP address back to its location. For this, just visit http://www.yougetsignal.com/tools/visual-tracert/ and
enter the IP you want to trace in the dialog box and hit the “Proxy
Trace” button. Wait for few seconds and the visual trace route tool
displays the path Internet packets traverse to reach a specified
destination. Hope this helps.
 Most of you may be curious to know how to find the IP address
of your friend’s computer or the IP of the person with whom you may be
chatting. If so, then this post will surely help you out.
Most of you may be curious to know how to find the IP address
of your friend’s computer or the IP of the person with whom you may be
chatting. If so, then this post will surely help you out.
In this post I’ll show you how to find the IP address of a remote computer in simple steps.
How to Capture the IP Address?
-
Download the IP Finder Script (IP_Finder.ZIP) that I have created from the following link:
-
Open a new account in X10Hosting (or any other free host that supports PHP).
-
Extract the IP_Finder.ZIP file and upload the two files ip.php and ip_log.txt into the root folder of your hosting account using the File Manager.
-
You can rename the ip.php to any name of your choice.
-
Set the permission to 777 on ip_log.txt.
Now, you are all set to find the IP
address of your friend or any remote computer of your choice. All you
have to do is send the link of ip.php to your friend or
the person with whom you’re chatting. Once the person click’s on the
link, his/her IP address is recorded in the file ip_log.txt.
For your better understanding let’s take up the following example:
Suppose you open a new account in X10hosting.com with the subdomain as abc, then your IP Finder link would be:
http://abc.x10hosting.com/ip.php
You have to send the above link to you
friend via email or while chatting and ask him to visit that link. Once
your friend clicks on the link, his IP address will be recorded along
with the Date and Time in the ip_log.txt file. After recording the IP address, the script will redirect the person to google.com so as to avoid any suspicion.
To find the recorded IP address, check the logs using the following link:
http://abc.x10hosting.com/ip_log.php
The sample log will be in the following format:
79.92.144.237 Thursday 07th of May 2009 05:31:27 PM
59.45.144.237 Thursday 07th of May 2009 05:31:28 PM
123.92.144.237 Thursday 07th of May 2009 05:31:31 PM
NOTE: You have to replace abc with your subdomain name.
 Internet Protocol (IP) addresses are usually of two types: Public and Private.
If you have ever wondered to know what is the difference between a
public and a private IP address, then you are at the right place.
Internet Protocol (IP) addresses are usually of two types: Public and Private.
If you have ever wondered to know what is the difference between a
public and a private IP address, then you are at the right place.
In this post I will try to explain the difference between a public and a private IP address in layman’s terms so that it becomes simple and easy to understand.
What are Public IP Addresses?
A public IP address is assigned to every
computer that connects to the Internet where each IP is unique. In this
case, there cannot exist two computers with the same public IP address
all over the Internet. This addressing scheme makes it possible for
the computers to “find each other” online and exchange information. User
has no control over the IP address (public) that is assigned to the
computer. The public IP address is assigned to the computer by the
Internet Service Provider as soon as the computer is connected to the
Internet gateway.
A public IP address can be either static or dynamic.
A static public IP address does not change and is used primarily for
hosting web pages or services on the Internet. On the other hand, a
dynamic public IP address is chosen from a pool of available addresses
and changes each time one connects to the Internet.
Most Internet users will only have a
dynamic IP assigned to their computer which goes off when the computer
is disconnected from the Internet. Thus when it is re-connected it gets a
new IP.
You can check your public IP address by visiting www.whatismyip.comWhat are Private IP Addresses?
An IP address is considered private if
the IP number falls within one of the IP address ranges reserved for
private networks such as a Local Area Network (LAN). The Internet
Assigned Numbers Authority (IANA) has reserved the following three
blocks of the IP address space for private networks (local networks):
10.0.0.0 – 10.255.255.255 (Total Addresses: 16,777,216) 172.16.0.0 – 172.31.255.255 (Total Addresses: 1,048,576) 192.168.0.0 – 192.168.255.255 (Total Addresses: 65,536)
Private
IP addresses are used for numbering the computers in a private network
including home, school and business LANs in airports and hotels which
makes it possible for the computers in the network to communicate with
each other.
Say for example, if a network X consists of 10 computers, each of them can be given an IP starting from 192.168.1.1 to 192.168.1.10. Unlike
the public IP, the administrator of the private network is free to
assign an IP address of his own choice (provided the IP number falls in
the private IP address range as mentioned above).
Devices
with private IP addresses cannot connect directly to the Internet.
Likewise, computers outside the local network cannot connect directly to
a device with a private IP. It is possible to interconnect two private
networks with the help of a router or a similar device that supports Network Address Translation.
If the
private network is connected to the Internet (through an Internet
connection via ISP), then each computer will have a private IP as well
as a public IP. Private IP is used for communication within the network
where as the public IP is used for communication over the Internet. Most
Internet users with a DSL/ADSL connection will have both a private as
well as a public IP.
You can know your private IP by typing ipconfig command in the command prompt. The number that you see against “IPV4 Address:” is your private IP which in most cases will be 192.168.1.1 or 192.168.1.2. Unlike the public IP, private IP addresses are always static in nature.
Common Myth about Private IP Address:
Most
people assume that a private IP is the one used for stealth Internet
activities and hence cannot be detected. But this is NOT TRUE!.
Unlike what most people think, a private
IP address (unlike the private telephone number) is just like any other
IP address that belongs to a private network. In reality, there is no
public IP address that is impossible to trace as the protocol itself is
designed for transparency.
 If you are working in the field of
computer networks or an enthusiast in the field of network security, you
are sure to have come across the term “Denial of Service attack”
which is simply referred to as “DoS attack”. Today, this is one of the
most common types of network attacks carried out on the Internet. In
this post, I will try to explain DoS attack, its variants and methods
involved to carry out the same in an easily understandable manner.
If you are working in the field of
computer networks or an enthusiast in the field of network security, you
are sure to have come across the term “Denial of Service attack”
which is simply referred to as “DoS attack”. Today, this is one of the
most common types of network attacks carried out on the Internet. In
this post, I will try to explain DoS attack, its variants and methods
involved to carry out the same in an easily understandable manner.What is a DOS Attack?
Denial of Service or DoS attack is a
type of network attack designed to flood the target network or machine
with a large amount of useless traffic so as to overload it and
eventually bring it down to its knees. The main intention behind DoS
attack is to make the services running on the target machine (such as a
website) temporarily unavailable to its intended users. DoS attacks are
usually carried out on web servers that host vital services such as
banking, e-commerce or credit card processing.
A common variant of DOS attack known as DDoS (Distributed Denial of Service)
attack has become quite popular in the recent days as it is more
powerful and hard to detect. A typical DoS attack has a single place of
origin while a DDoS attack originates from multiple IP addresses
distributed across two or more different network. The working of a DDoS
attack is shown in the following diagram:

Unlike a DoS attack where the attacker
uses one single computer or a network to attack the target, a DDoS the
attack originates from different pre-compromised computers belonging to
different networks. As the attacker uses a number of computer systems
from different networks each residing in different geographical
locations, the incoming traffic looks natural and therefore becomes hard
to detect.
Protection Against DoS/DDoS Attacks:
DoS attacks can easily be handled by
blacklisting the target IP (or range of IPs) that are found to be making
too many requests/connections (in an unnatural way) to the server.
However, DDoS attacks are complicated as the incoming requests seem more
natural and distributed. In this case it is hard to find the difference
between the genuine and malicious traffic. Taking an action at the
firewall level to blacklist suspected IPs may result in false positives
and therefore may affect the genuine traffic as well.
Methods Involved in DoS Attack:
The following are some of the commonly employed methods in carrying out a DoS attack:
- SYN Flood Attack
- Ping Flood Attack (Ping of Death)
- Teardrop Attack
- Peer-to-Peer Attacks
 Microsoft Windows offers a feature-rich
interface and several customization options that make it one of the most
user friendly operating systems in the world. However, computer geeks
would still love to hack the Windows Registry so as to add more extra features and functionalities to their operating system.
Microsoft Windows offers a feature-rich
interface and several customization options that make it one of the most
user friendly operating systems in the world. However, computer geeks
would still love to hack the Windows Registry so as to add more extra features and functionalities to their operating system.
If you’re one such geek who would like
to customize Windows in your own way, here is a list of 8 interesting
registry hacks that you need to try:
1. Disable USB Devices:
Disabling USB ports can be a smart idea
to add security to the computer. This can be really handy if the
computer is on a public place where the chances of virus and other
malware infection is really high. You can easily disable access to USB
ports with the following registry hack:
- Open the Registry Editor (Start -> Run -> Type regedit and hit Enter)
- In the registry, navigate to the following key:
HKEY_LOCAL_MACHINE\SYSTEM\CurrentControlSet\Services\UsbStor - In the right-side pane, double-click on “Start”.
- In the “Value data” field enter 4 and click on “OK”.
- Close the Registry Editor and reboot.
To enable USB devices, follow the same procedure as above except in the step-4 enter 3 in the “Value data” field.
Works on Windows XP, Vista and 7.
2. Disable Notification Balloons in Windows 7 and Vista:
You can now disable the annoying
notification balloons that keeps popping up frequently with warning
messages and reminders. Here is a step-by-step procedure to do that:
- Open the Registry Editor and navigate to the following key:
HKEY_CURRENT_USER\Software\Microsoft\Windows\CurrentVersion\Explorer\Advanced - Right-click on the right-hand pane, and create a new “DWORD”.
- Rename it to EnableBalloonTips, double-click on it and set the “Value data” to 0. Reboot the computer to see the changes in effect.
3. Add “Recycle Bin” to My Computer in Windows 7 and Vista:
Would you like to add the “Recycle Bin”
icon to My Computer so that you need not go back to the desktop to
access it when required? Well, here is how you can do that:
- Open the Registry Editor and navigate to the following key:
HKEY_LOCAL_MACHINE\SOFTWARE\Microsoft\Windows\CurrentVersion\Explorer\MyComputer\NameSpace - Right-click on “NameSpace” and select New -> Key. Name the key with the following name:
{645FF040-5081-101B-9F08-00AA002F954E} - Now, open “My Computer” and hit F5 to refresh the screen. This should show up the “Recycle Bin” icon.
4. Disable the Windows Task Manager:
Need to limit access to your computer by disabling the Task Manager? Here is a simple registry hack to do this:
- Open the Registry Editor and navigate to the following key:
HKEY_CURRENT_USER\Software\Microsoft\Windows\CurrentVersion\Policies - Right-click on “Policies”, select New -> Key and name the key as System.
If you are on Windows XP, you need not create the new key “System” as it is already present in it. So, you can directly navigate to: HKEY_CURRENT_USER\Software\Microsoft\Windows\CurrentVersion\Policies\System in the Step-1 itself. - Right-click on “System”, create a new “DWORD” and name it to DisableTaskMgr.
- Double-click on the DWORD “DisableTaskMgr” and set the “Value data” to 1 (0=Enable, 1=Disable).
- To enable the Task Manager, Set the “Value data” back to 0.
Works on Windows XP, Vista and 7.
5. Change the Registered Owner and Organization Name:
Here is a simple hack to change the name of the Registered owner on your computer:
- Open the Registry Editor and navigate to:
HKEY_LOCAL_MACHINE\SOFTWARE\Microsoft\Windows NT\CurrentVersion - On the right-side pane, find the keys RegisteredOwner and RegisteredOrganization. Double-click on them to change the names to whatever you want.
- To see the changes, right-click on “My Computer” and select “Properties”.
Works on Windows XP, Vista and 7.
6. Add Programs to Windows Startup:
You can now add your favorite programs
to Windows Startup without the need for using the start-up folder. Here
is a way to do this:
- Open the Registry Editor and navigate to the following key:
HKEY_CURRENT_USER\Software\Microsoft\Windows\CurrentVersion\Run - On the right-side pane, create a new “String Value” and rename it to the name of the program that you want to add (you can give any name, it doesn’t matter).
- Double-click on the “String Value”, in the “Value data” field add the path of the executable program that has to execute at startup.
- Reboot the computer to see the changes in effect.
Works on Windows XP, Vista and 7.
7. Add “Pin to Start Menu” Option for Folders in Windows 7 and Vista:
Ever wanted to pin a folder to the start
menu to gain faster access to it? Well, it is possible to add the “Pin
to Start Menu” option so that you can plug your favorite folders to
Start Menu. Here is a step-by-step procedure:
- Open the Registry Editor and navigate to:
HKEY_CLASSES_ROOT\Folder\shellex\ContextMenuHandlers - Right-click on “ContextMenuHandlers” and select New -> Key. Name the key as follows:
{a2a9545d-a0c2-42b4-9708-a0b2badd77c8} - Now, whenever you want to add a folder to Start Menu, hold down the Shift key and right-click on the folder. You should see the “Pin to Start Menu” option in the context menu”.
8. Disable “Aero Shake” in Windows 7:
One of the new additions to Windows 7 is the “Aero Shake”
feature using which it is possible to grab a window using its title bar
and shake it. This will minimize all the other open windows if any. It
is really a handy feature! However, if you ever wanted to disable this
feature, here is a solution:
- Open the Registry Editor and navigate to the following key:
HKEY_CURRENT_USER\Software\Policies\Microsoft\Windows - Now, right-click on “Windows” key and create a new Key called Explorer.
- Right-click on the “Explorer” key and create a new “DWORD” called NoWindowMinimizingShortcuts and set its value to 1.
- Close the Registry Editor and reboot the computer to see the changes in effect.
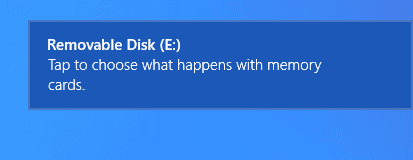 Windows 8 is among the most incredible
and interesting kind of Windows version from Microsoft. It has visually
eye catching design, which is found in modern user interface that is
meant for redesigning a number of operating systems, worked out for
users. If you have used or seen someone using Windows 8 you could have
noticed the toast notifications in this modern version of windows, which
simply appears the moment you install or uninstall any application.
There are many users who are well versed with the bubble notifications,
which were found in the earlier versions of Windows seen via the
taskbar. The new application platform in Windows 8 comes with an
integrated notification system for installing or uninstalling a number
of modern applications.
Windows 8 is among the most incredible
and interesting kind of Windows version from Microsoft. It has visually
eye catching design, which is found in modern user interface that is
meant for redesigning a number of operating systems, worked out for
users. If you have used or seen someone using Windows 8 you could have
noticed the toast notifications in this modern version of windows, which
simply appears the moment you install or uninstall any application.
There are many users who are well versed with the bubble notifications,
which were found in the earlier versions of Windows seen via the
taskbar. The new application platform in Windows 8 comes with an
integrated notification system for installing or uninstalling a number
of modern applications.
The Windows 8 style application can
employ a number of notifications types including the traditional toast
notifications, live titles and lock screen. These can be managed by
either disabling or enabling the notification of your application for
certain accounts or simply silencing the notifications temporarily so
that you are not often bugged by them. Unfortunately, this new version
of Windows 8 simply doesn’t carry any notification center, which allows
you to view the history of your notifications in just one place. The pop
up notification of Windows 8 is very much transient wherein its lock
screen application and live tiles portray a more permanent kind of
notifications. Well, let’s check out the step by step tips to enable
Toast Notifications found in Windows 8 as under:
Enabling Toast Notifications on Windows 8
You have a number of options when it
comes to enabling or even disabling the Toast Notifications in Windows
8. This feature is very much beneficial; however, at times it can be
annoying while you see them popping up time and again. Hence you have
some simple ways to enable and disable the same. Once you have disabled
it and after some time want to enable it, don’t get disheartened. Unlike
the simple ways of disabling, the steps involved for enabling the toast
notifications in Windows 8 too are very much simple. Let’s check them
step by step.
Steps for Enabling Toast Notifications:
The users have the option to receive the
toast notifications by simply changing the PC settings found over the
OfficeScan client PC. This is the place where you have the option of
enabling the toast notifications.
Step 1 – If you are keen
to enable the same, the first step you need to do is to move the
pointer of your mouse at the right corner of your screen just at the
bottom side so that you end up displaying the Charms bar.
Step 2 – Once you carry
out the first step, it’s time to move to the second, wherein you need to
click at Settings and then to – “Change PC Settings” then you will see
the PC Settings screen appearing before you.
Step 3 – Once you are
done with the second step, it’s time to head on to the third step
wherein you need to click over the option called “Notifications”. The
moment you click over this section, you are supposed to choose the “On
button” so that you enable the Toast Notifications in your Windows 8
based computer system.
Step 4 – This is the
final step, wherein you have to choose on the option of “ON” to the
three things. These include the “Show App Notifications”, “Play
Notification Sounds” and the “Show Application Notifications” on the
Lock Screen. The first one is mandatory while the last two are are
optional and the choice to enable them is upto you.
 Whonix has called TorBOX is an anonymous general purpose operating system based on Virtual Box, Debian GNU/Linux and Tor.
By Whonix design, IP and DNS leaks are impossible. Not even malware with root rights can find out the user's real IP/location.
This is because Whonix consists of two (virtual) machines. One machine solely runs Tor and acts as a gateway, which we call Whonix-Gateway. The other machine, which we call Whonix-Workstation, is on a completely isolated network. Only connections through Tor are possible.
Whonix is produced independently from the Tor (r) anonymity software and carries no guarantee from The Tor Project about quality, suitability or anything else. Due to trademark issues the project was renamed to Whonix.


JARVIS is totally different from other OS because its function can be control by voice. This OS will help the users for information gathering, scanning, searching , etc. Also handling Social profiles for users. We talked with one of the JARVIS developer named Chiragh dewan.
A group of Indian Hackers has designed Artificial Intelligence Assistant Operating System called 'J.A.R.V.I.S' , who recognizes them, answer questions, tweet for them and Collect information, scan targets for them.
Chiragh Dewan, a 18 year old student who
is currently pursuing his BCA has taken the initiative to be the first
Indian to complete this project J.A.R.V.I.S , which is inspired by Iron Man’s (movie) artificial intelligence assistant Jarvis.
Their long term goal is to create an OS which could adapt itself
according to the user's needs. Like if a doctor is using the OS, it will
adapt itself so as it is capable of helping him out in his field like
searching for new techniques, medicines, help in their research, etc.
Add for architects, other professions.
As for users in the IT Security field, it would help the users in
information gathering, scanning, etc. Making an app for mobile by which
you would be able to communicate with you're system remotely and give
him tasks to do, ask questions, etc.
It all started with the release of Iron Man 3, after which Chiragh was
determined to make Jarvis. Having no experience in Artificial
Intelligence, he came home and started learning AI through online
courses. The research work had started during which he came across a
post by Himanshu stating that he too has been working on this project
and would like people fro join him. After a detailed conversation and
exchange of ideas, the project had started. During their course of
development more people joined the project.
Project Task Completed: In the current version of Jarvis v1.0, it is capable of:
- Answering questions asked by the administrator
- Compile reports on any topic asked by the user.
- Control lights by voice.
- Basic interaction with the user.
- Handling Facebook, Email and Social profiles of users
- Using Twitter Account with voice control
- Basic OS kernel is ready.
- Can Scan targets for Hackers
- Gathering Basic information about the target
All the above functionalities are completely controlled by voice. It has
only been four months since they have started this project and have
achieved a lot in this short period of time.
The team will announce the OS publicly soon after completion of phase 3, but for now Chiragh proudly shows off his creation on the J.A.R.V.I.S project website.


