Showing posts with label Windows. Show all posts
We have seen Windows XP being Installed on Android
device But this is nothing like you have seen before. First time someone
has ported desktop Windows OS on iPhone and has managed to get it
working. i.e Windows 98 (pre-millennium Windows version) on iPhone 6
Plus.
A Chinese hacker with the handle xyqo58775 on popular Chinese tech forum posted about how he was able to successfully install Windows 98
on an iPhone 6 Plus and even provides tutorial on the same. The install
seems to be the real thing and not the script-based emulation.

The most interesting thing is that he managed to carry out this hack
without jail-breaking his device. He reportedly used a legal version of iDOS, which probably does a fine job at emulating. iDos is an emulator that allows you to play dos games on your iPhone or iPad.
The hacker claims that he has only used the existing resources &
tools available and he is “not a big God”. He also said that he will get
Windows XP running on iPhone 6 Plus whenever he gets time. Meanwhile if
you know Chinese you can refer his tutorial on Installing Windows 98 on iPhone 6 Plus here [Google Translate].


 Microsoft Windows offers a feature-rich
interface and several customization options that make it one of the most
user friendly operating systems in the world. However, computer geeks
would still love to hack the Windows Registry so as to add more extra features and functionalities to their operating system.
Microsoft Windows offers a feature-rich
interface and several customization options that make it one of the most
user friendly operating systems in the world. However, computer geeks
would still love to hack the Windows Registry so as to add more extra features and functionalities to their operating system.
If you’re one such geek who would like
to customize Windows in your own way, here is a list of 8 interesting
registry hacks that you need to try:
1. Disable USB Devices:
Disabling USB ports can be a smart idea
to add security to the computer. This can be really handy if the
computer is on a public place where the chances of virus and other
malware infection is really high. You can easily disable access to USB
ports with the following registry hack:
- Open the Registry Editor (Start -> Run -> Type regedit and hit Enter)
- In the registry, navigate to the following key:
HKEY_LOCAL_MACHINE\SYSTEM\CurrentControlSet\Services\UsbStor - In the right-side pane, double-click on “Start”.
- In the “Value data” field enter 4 and click on “OK”.
- Close the Registry Editor and reboot.
To enable USB devices, follow the same procedure as above except in the step-4 enter 3 in the “Value data” field.
Works on Windows XP, Vista and 7.
2. Disable Notification Balloons in Windows 7 and Vista:
You can now disable the annoying
notification balloons that keeps popping up frequently with warning
messages and reminders. Here is a step-by-step procedure to do that:
- Open the Registry Editor and navigate to the following key:
HKEY_CURRENT_USER\Software\Microsoft\Windows\CurrentVersion\Explorer\Advanced - Right-click on the right-hand pane, and create a new “DWORD”.
- Rename it to EnableBalloonTips, double-click on it and set the “Value data” to 0. Reboot the computer to see the changes in effect.
3. Add “Recycle Bin” to My Computer in Windows 7 and Vista:
Would you like to add the “Recycle Bin”
icon to My Computer so that you need not go back to the desktop to
access it when required? Well, here is how you can do that:
- Open the Registry Editor and navigate to the following key:
HKEY_LOCAL_MACHINE\SOFTWARE\Microsoft\Windows\CurrentVersion\Explorer\MyComputer\NameSpace - Right-click on “NameSpace” and select New -> Key. Name the key with the following name:
{645FF040-5081-101B-9F08-00AA002F954E} - Now, open “My Computer” and hit F5 to refresh the screen. This should show up the “Recycle Bin” icon.
4. Disable the Windows Task Manager:
Need to limit access to your computer by disabling the Task Manager? Here is a simple registry hack to do this:
- Open the Registry Editor and navigate to the following key:
HKEY_CURRENT_USER\Software\Microsoft\Windows\CurrentVersion\Policies - Right-click on “Policies”, select New -> Key and name the key as System.
If you are on Windows XP, you need not create the new key “System” as it is already present in it. So, you can directly navigate to: HKEY_CURRENT_USER\Software\Microsoft\Windows\CurrentVersion\Policies\System in the Step-1 itself. - Right-click on “System”, create a new “DWORD” and name it to DisableTaskMgr.
- Double-click on the DWORD “DisableTaskMgr” and set the “Value data” to 1 (0=Enable, 1=Disable).
- To enable the Task Manager, Set the “Value data” back to 0.
Works on Windows XP, Vista and 7.
5. Change the Registered Owner and Organization Name:
Here is a simple hack to change the name of the Registered owner on your computer:
- Open the Registry Editor and navigate to:
HKEY_LOCAL_MACHINE\SOFTWARE\Microsoft\Windows NT\CurrentVersion - On the right-side pane, find the keys RegisteredOwner and RegisteredOrganization. Double-click on them to change the names to whatever you want.
- To see the changes, right-click on “My Computer” and select “Properties”.
Works on Windows XP, Vista and 7.
6. Add Programs to Windows Startup:
You can now add your favorite programs
to Windows Startup without the need for using the start-up folder. Here
is a way to do this:
- Open the Registry Editor and navigate to the following key:
HKEY_CURRENT_USER\Software\Microsoft\Windows\CurrentVersion\Run - On the right-side pane, create a new “String Value” and rename it to the name of the program that you want to add (you can give any name, it doesn’t matter).
- Double-click on the “String Value”, in the “Value data” field add the path of the executable program that has to execute at startup.
- Reboot the computer to see the changes in effect.
Works on Windows XP, Vista and 7.
7. Add “Pin to Start Menu” Option for Folders in Windows 7 and Vista:
Ever wanted to pin a folder to the start
menu to gain faster access to it? Well, it is possible to add the “Pin
to Start Menu” option so that you can plug your favorite folders to
Start Menu. Here is a step-by-step procedure:
- Open the Registry Editor and navigate to:
HKEY_CLASSES_ROOT\Folder\shellex\ContextMenuHandlers - Right-click on “ContextMenuHandlers” and select New -> Key. Name the key as follows:
{a2a9545d-a0c2-42b4-9708-a0b2badd77c8} - Now, whenever you want to add a folder to Start Menu, hold down the Shift key and right-click on the folder. You should see the “Pin to Start Menu” option in the context menu”.
8. Disable “Aero Shake” in Windows 7:
One of the new additions to Windows 7 is the “Aero Shake”
feature using which it is possible to grab a window using its title bar
and shake it. This will minimize all the other open windows if any. It
is really a handy feature! However, if you ever wanted to disable this
feature, here is a solution:
- Open the Registry Editor and navigate to the following key:
HKEY_CURRENT_USER\Software\Policies\Microsoft\Windows - Now, right-click on “Windows” key and create a new Key called Explorer.
- Right-click on the “Explorer” key and create a new “DWORD” called NoWindowMinimizingShortcuts and set its value to 1.
- Close the Registry Editor and reboot the computer to see the changes in effect.
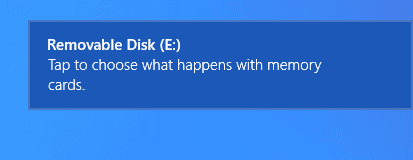 Windows 8 is among the most incredible
and interesting kind of Windows version from Microsoft. It has visually
eye catching design, which is found in modern user interface that is
meant for redesigning a number of operating systems, worked out for
users. If you have used or seen someone using Windows 8 you could have
noticed the toast notifications in this modern version of windows, which
simply appears the moment you install or uninstall any application.
There are many users who are well versed with the bubble notifications,
which were found in the earlier versions of Windows seen via the
taskbar. The new application platform in Windows 8 comes with an
integrated notification system for installing or uninstalling a number
of modern applications.
Windows 8 is among the most incredible
and interesting kind of Windows version from Microsoft. It has visually
eye catching design, which is found in modern user interface that is
meant for redesigning a number of operating systems, worked out for
users. If you have used or seen someone using Windows 8 you could have
noticed the toast notifications in this modern version of windows, which
simply appears the moment you install or uninstall any application.
There are many users who are well versed with the bubble notifications,
which were found in the earlier versions of Windows seen via the
taskbar. The new application platform in Windows 8 comes with an
integrated notification system for installing or uninstalling a number
of modern applications.
The Windows 8 style application can
employ a number of notifications types including the traditional toast
notifications, live titles and lock screen. These can be managed by
either disabling or enabling the notification of your application for
certain accounts or simply silencing the notifications temporarily so
that you are not often bugged by them. Unfortunately, this new version
of Windows 8 simply doesn’t carry any notification center, which allows
you to view the history of your notifications in just one place. The pop
up notification of Windows 8 is very much transient wherein its lock
screen application and live tiles portray a more permanent kind of
notifications. Well, let’s check out the step by step tips to enable
Toast Notifications found in Windows 8 as under:
Enabling Toast Notifications on Windows 8
You have a number of options when it
comes to enabling or even disabling the Toast Notifications in Windows
8. This feature is very much beneficial; however, at times it can be
annoying while you see them popping up time and again. Hence you have
some simple ways to enable and disable the same. Once you have disabled
it and after some time want to enable it, don’t get disheartened. Unlike
the simple ways of disabling, the steps involved for enabling the toast
notifications in Windows 8 too are very much simple. Let’s check them
step by step.
Steps for Enabling Toast Notifications:
The users have the option to receive the
toast notifications by simply changing the PC settings found over the
OfficeScan client PC. This is the place where you have the option of
enabling the toast notifications.
Step 1 – If you are keen
to enable the same, the first step you need to do is to move the
pointer of your mouse at the right corner of your screen just at the
bottom side so that you end up displaying the Charms bar.
Step 2 – Once you carry
out the first step, it’s time to move to the second, wherein you need to
click at Settings and then to – “Change PC Settings” then you will see
the PC Settings screen appearing before you.
Step 3 – Once you are
done with the second step, it’s time to head on to the third step
wherein you need to click over the option called “Notifications”. The
moment you click over this section, you are supposed to choose the “On
button” so that you enable the Toast Notifications in your Windows 8
based computer system.
Step 4 – This is the
final step, wherein you have to choose on the option of “ON” to the
three things. These include the “Show App Notifications”, “Play
Notification Sounds” and the “Show Application Notifications” on the
Lock Screen. The first one is mandatory while the last two are are
optional and the choice to enable them is upto you.
 The following are the IP utilities available in Windows that help in finding out the information about IP Hosts and domains. These are the basic IP commands that every beginner in the field of hacking must know!
Please note that the the term Host used in this article may also be assumed as a Website for simple understanding purpose.
1. PING
PING is a simple application (command) used to determine whether a host is online and available. PING command sends one or more ICMP
“Echo message” to a specified host requesting a reply. The receiver
(Target Host) responds to this ICMP “Echo message” and returns it back
to the sender. This confirms that the host is online and available.
Otherwise the host is said to be unavailable.
Syntax:C:\>ping gohacking.com
2. TELNET
Telnet command is used to connect to a
desired host on a specified port number. Just like a house having
several doors, a host or a server has different ports running different
services. For example port 80 runs HTTP, port 23 runs TELNET while port
25 SMTP. Like this there are several ports on a server through which it
is possible for a remote client to establish a connection.
For a connection to be established, the
port has to be open. For example, in the following command, we are
trying to establish a connection with the Yahoo server on port 25.:
Syntax:C:\>telnet yahoo.com 25C:\>telnet yahoo.com
The default port number is 23. When the port number is not specified the default number is assumed.
NOTE: If you are using Vista or Windows 7, Telnet feature may not be available by default. To enable it, you can refer my other post: How to enable Telnet feature in Vista and Windows 7?.
3. NSLOOKUP
Many times, we think about finding out
the IP address of a given site. Say for example google.com, yahoo.com,
microsoft.com etc. But how to do this? There are several websites out
there that can be used to find out the IP address of any given website.
However, in the Windows operating itself, we have an inbuilt tool to do
this job for us. It is called “nslookup”.
This tool can be used for resolving a
given domain name into its IP address (determine the IP of a given site
name). Not only this, it can also be used for reverse IP lookup. That
is, if the IP address is given it determines the corresponding domain
name for that IP address.
Syntax:C:\>nslookup google.com
4. NETSTAT
The netstat command can be used to display the current TCP/IP
network connections. For example, the following “netstat” command
displays all the currently established connections and their
corresponding listening port numbers on your computer.
Syntax:C:\>netstat -aType “Ctrl+Z” to exit.
This command can be used to determine
the IP address/Host names of all the applications connected to your
computer. If a hacker is connected to your system even the hacker’s IP
is displayed. So, the “netstat” command can be used to get an idea of
all the active connections of a given system.
NOTE: In order to obtain help on any given command such as its syntax, attributes etc., just type the “command-name /?” to obtain usage details on it. For example, to obtain help on “netstat” command just type: netstat /? and hit enter.
 Most of you may be familiar with the telnet
command. It is one of the well known Windows IP Utilities. If you are
using a Windows XP computer, the telnet command is available by default.
However, in case of Vista and Windows 7, the telnet command is disabled
by default.
Most of you may be familiar with the telnet
command. It is one of the well known Windows IP Utilities. If you are
using a Windows XP computer, the telnet command is available by default.
However, in case of Vista and Windows 7, the telnet command is disabled
by default.
So, when you try to use the telnet command in Windows Vista/7 you get the following error message:
‘telnet’ is not recognized as an internal or external command, operable program or batch file.
You get this error because unlike
Windows XP, Vista and Windows 7 have the telnet feature disabled by
default. So, in order to fix this issue, you will have to manually enable/turn on the telnet feature.
Here is a step-by-step procedure to turn on the telnet feature in Vista and Windows 7:
-
Go to the Control Panel.
-
Click on the sub heading “Uninstall a program” under the main heading Programs.NOTE: IF you are in the Classic View click on Programs and Features.
-
In the left panel under the Tasks select the option Turn Windows features on or off.
-
Now, a new window will open up. In this new window, select the following options:Telnet ClientTelnet Server (optional)
-
After selecting click on OK.
Now, wait for few minutes till the
telnet feature is installed. Once the telnet feature is installed you
can go to the command prompt and use the telnet command. System restart is not required.


