Showing posts with label Tips. Show all posts
 You can now easily monitor your room,
office or workplace for activities going on during your absence without
having to invest on expensive hidden cameras. If you’ve ever wondered to
find a way to turn your PC webcam into a spy camera, here is a simple
and effective solution. This can be really handy to monitor your
children and pets in home or even catch a cheating spouse red handed!
For this, all you need is a computer with an Internet connection and a
webcam attached to it.
You can now easily monitor your room,
office or workplace for activities going on during your absence without
having to invest on expensive hidden cameras. If you’ve ever wondered to
find a way to turn your PC webcam into a spy camera, here is a simple
and effective solution. This can be really handy to monitor your
children and pets in home or even catch a cheating spouse red handed!
For this, all you need is a computer with an Internet connection and a
webcam attached to it.
If your computer meets the above simple requirements, then you are all set to go. The site called UGOlog.com
provides a free solution to simply transform your webcam into a
powerful spy camera in just a few steps. You can sign-up for a free
account and start using the service immediately.
Since UGOlog service runs as a web
application from within the browser, there is no need to install any
additional software on your computer. That means, when your spouse or
children look through the installed programs, they don’t find anything
that arouses suspicion.

The following are some of the advantages of using UGOlog service over other software programs or a conventional spy camera:
- Firstly, the service comes for free, so that you don’t need to buy anything to start with.
- Unlike software programs such as “Webcam Monitor” which is complicated to configure and lacks stealth operation, UGOlog needs no installation and is simple to setup.
- UGOlog comes with powerful features such as as motion detection, email alerts, and interval snapshots.
- You have the option to view the camera remotely from anywhere just by logging into your UGOlog account.

Once you’ve created your account, you can take up a quick tour and browse through the configuration guide
to begin using the service. The free version of UGOlog limits the
service for only 1 webcam and 50 MB of storage space. If you wish to
setup more than one camera and need additional space for recording more
videos, you can easily switch for paid plans as per your convenience.
 As the use of Internet is increasing, the
chances of your computer getting hacked are also increasing
dramatically. There is plenty of file sharing and web surfing that is
being done, which makes your computer vulnerable for attack. But this
article will help you in deciding what steps to take if your computer
gets hacked.
As the use of Internet is increasing, the
chances of your computer getting hacked are also increasing
dramatically. There is plenty of file sharing and web surfing that is
being done, which makes your computer vulnerable for attack. But this
article will help you in deciding what steps to take if your computer
gets hacked.How to Find if Your Computer is Hacked?
It is important to know when your computer has been actually hacked and when it is just behaving weird:
- Sometimes it’s just simple and the hacker may leave some note or warning to prove that your computer is actually hacked.
- You are not able to access your various mails and social media accounts or at worst you are not able to access your computer.
Steps to Take if Your Computer Gets Hacked:
1. Check the Impact of Damage
After using your computer for some time
you would know what type of infection you are facing whether it’s
malware, virus, trojan, keylogger (spyware) or anything else. In case a
keylogger application is installed, you can use a good antispyware
program to remove the infection. However, formatting the hard drive is a
better option if the infection is severe. You should try to back-up all
the important and confidential files that you may have in your computer
before formatting.
2. Damage Control
You should run antivirus programs to determine the extent of damage. Users of Windows OS can run “Malware bytes” which can be found freely and recognises various harmful applications which antivirus cannot. Sophos Mac antivirus is a free application which can be used by Mac users.
3. Removal
After running several scans you will know
what is the extent of damage you are facing. After making the list of
viruses and malware that have infected your computer, next thing you
need to find is what the impact of damage is. For that you must check
the details about those viruses and malware programs to know how they
rank in terms of damages they can have in your computer. You must carry
out the searches from a neutral device which is not hacked and search
for removal tools for those malware programs which have infected your
computer. Unfortunately, if after several tries you are not able to
clean your computer then the only option left is to re-install your
operating system.
4. Offline Hacking
This is true that Internet is the most
common way to hack a computer, but it is possible that anybody can hack
your system using USB devices. The process of removal of the infection
is the same in this case as well. The best precaution you can take to
avoid such situations is to password protect your computer OS and BIOS.
This makes it difficult for anyone to gain access to your computer.
Conclusion:
The best thing that you can do is to
protect your computer by using fully updated antivirus and a good
firewall. It is also wise to have a protection tool for windows
registry. To protect your files, you can use encryption tools so as to
encrypt the data on your hard disk. As there is no 100% foolproof way to
prevent hacking it is always better to take precautionary measures.
 For very many people, security is one of
the most important issues when it gets to sending their files into the
cloud. They worry that their files will be seen or even compromised by
other persons because that is what took place in the past. The user
accounts used to be hacked, cloud storage systems failed and personal
files and data were exposed. Therefore, how can you successfully prevent
that from ever happening even when the account gets hacked or something
happens to your provider of cloud storage?
For very many people, security is one of
the most important issues when it gets to sending their files into the
cloud. They worry that their files will be seen or even compromised by
other persons because that is what took place in the past. The user
accounts used to be hacked, cloud storage systems failed and personal
files and data were exposed. Therefore, how can you successfully prevent
that from ever happening even when the account gets hacked or something
happens to your provider of cloud storage?The answer to that question is encryption
Encryption can be defined as the process
of making one’s files unreadable with a pass phrase or an encryption key
so that even when another person gains access to the files, it does not
matter because the intruder will only be able to see gibberish. To be
able to see very properly what is in the file, one must have a key.
This article contains the two different
ways through which one can make his or her files secure and be able to
safely use cloud storage without any worries.
Available options
Essentially, when it gets to encrypting files in the cloud, one has two options from which he or she can choose, that is:
- He or she may choose the cloud storage with a built in encryption.
- Make use of a service which encrypts folders and/or files for him or her.
Cloud storage service with built-in encryption
Regardless of your choice, both of the
ways to encrypt data to store in cloud have advantages and
disadvantages. If you decide to go with the dedicated secure cloud
service, you might be required to change the entire setup of
transferring files to that specific service, familiarize yourself with
the way it works and probably give up on a certain third party support,
mainly if you come from the most well-liked cloud storage and syncing
service, that is “Dropbox”. Alternatively, you have got everything under
one hood and you do not have to worry any more about file security and
integrity.
Service for encryption only
If you are using a service which is
dedicated to encrypting your files, you will be having more control over
which files you would like to encrypt and where you would like them to
be stored. For instance, you may choose Dropbox, if at all you like the
service; and not give up after encrypting the files properly.
Conversely, your files might take longer to be properly synced in case
you are getting them encrypted using third party apps.
Conclusion
Either way, it is believed to be very
necessary to protect one’s files using the most proper encryption, most
especially if he or she is using Dropbox for managing his or her
critical files such as contracts, password databases, or any other
personal or business files which may be considered to be very important.
Depending on an individual, some would
like to install another software on their computers just for the purpose
of encryption, while others not. Those who don’t may take advantage of
the idea of signing up for a dedicated cloud solution which has built-in
local encryption for all the files. Some of such solutions available
include SpiderOak, Wuala and Cubby. If online viruses are among the
things troubling you, you may also consider making use of the Norton Contact Phone number so as to inquire about how you can be helped.
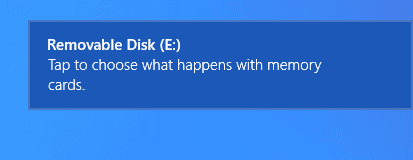 Windows 8 is among the most incredible
and interesting kind of Windows version from Microsoft. It has visually
eye catching design, which is found in modern user interface that is
meant for redesigning a number of operating systems, worked out for
users. If you have used or seen someone using Windows 8 you could have
noticed the toast notifications in this modern version of windows, which
simply appears the moment you install or uninstall any application.
There are many users who are well versed with the bubble notifications,
which were found in the earlier versions of Windows seen via the
taskbar. The new application platform in Windows 8 comes with an
integrated notification system for installing or uninstalling a number
of modern applications.
Windows 8 is among the most incredible
and interesting kind of Windows version from Microsoft. It has visually
eye catching design, which is found in modern user interface that is
meant for redesigning a number of operating systems, worked out for
users. If you have used or seen someone using Windows 8 you could have
noticed the toast notifications in this modern version of windows, which
simply appears the moment you install or uninstall any application.
There are many users who are well versed with the bubble notifications,
which were found in the earlier versions of Windows seen via the
taskbar. The new application platform in Windows 8 comes with an
integrated notification system for installing or uninstalling a number
of modern applications.
The Windows 8 style application can
employ a number of notifications types including the traditional toast
notifications, live titles and lock screen. These can be managed by
either disabling or enabling the notification of your application for
certain accounts or simply silencing the notifications temporarily so
that you are not often bugged by them. Unfortunately, this new version
of Windows 8 simply doesn’t carry any notification center, which allows
you to view the history of your notifications in just one place. The pop
up notification of Windows 8 is very much transient wherein its lock
screen application and live tiles portray a more permanent kind of
notifications. Well, let’s check out the step by step tips to enable
Toast Notifications found in Windows 8 as under:
Enabling Toast Notifications on Windows 8
You have a number of options when it
comes to enabling or even disabling the Toast Notifications in Windows
8. This feature is very much beneficial; however, at times it can be
annoying while you see them popping up time and again. Hence you have
some simple ways to enable and disable the same. Once you have disabled
it and after some time want to enable it, don’t get disheartened. Unlike
the simple ways of disabling, the steps involved for enabling the toast
notifications in Windows 8 too are very much simple. Let’s check them
step by step.
Steps for Enabling Toast Notifications:
The users have the option to receive the
toast notifications by simply changing the PC settings found over the
OfficeScan client PC. This is the place where you have the option of
enabling the toast notifications.
Step 1 – If you are keen
to enable the same, the first step you need to do is to move the
pointer of your mouse at the right corner of your screen just at the
bottom side so that you end up displaying the Charms bar.
Step 2 – Once you carry
out the first step, it’s time to move to the second, wherein you need to
click at Settings and then to – “Change PC Settings” then you will see
the PC Settings screen appearing before you.
Step 3 – Once you are
done with the second step, it’s time to head on to the third step
wherein you need to click over the option called “Notifications”. The
moment you click over this section, you are supposed to choose the “On
button” so that you enable the Toast Notifications in your Windows 8
based computer system.
Step 4 – This is the
final step, wherein you have to choose on the option of “ON” to the
three things. These include the “Show App Notifications”, “Play
Notification Sounds” and the “Show Application Notifications” on the
Lock Screen. The first one is mandatory while the last two are are
optional and the choice to enable them is upto you.


